Amazon EC2 (Elastic Compute Cloud) offers a vast array of virtual server options, including Windows Server instances. This blog post will walk you through the process of setting up a Windows EC2 instance on AWS, providing a solid foundation for your cloud-based Windows workloads.
Prerequisites:
An AWS Account: If you don't have one already, sign up for a free tier account at https://aws.amazon.com/free/.
Basic understanding of AWS terminology like EC2 instances, Security Groups, and Amazon Machine Images (AMIs).
RD Client: A remote desktop application for accessing remote desktops. Windows computers already have it installed, and It is also available for Mac, iOS and Android.
Step 1: Choose an AMI
Log in to the AWS Management Console and navigate to the EC2 service.
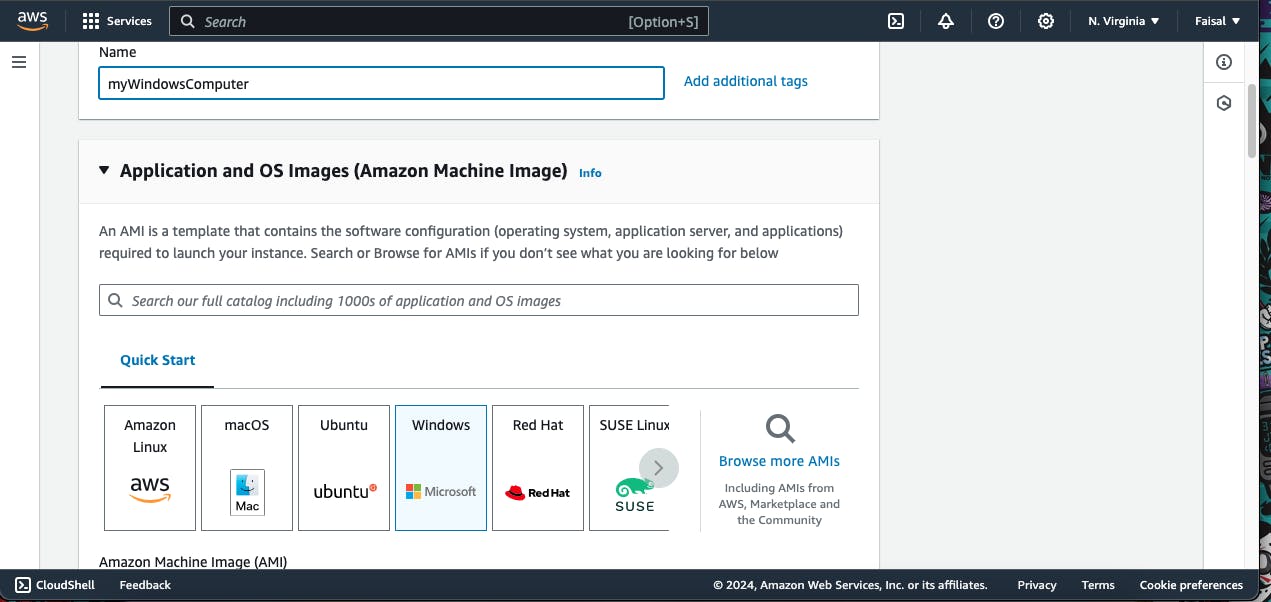
In the launch instance wizard, provide your instance name, select
Windowsunder the various operating system.
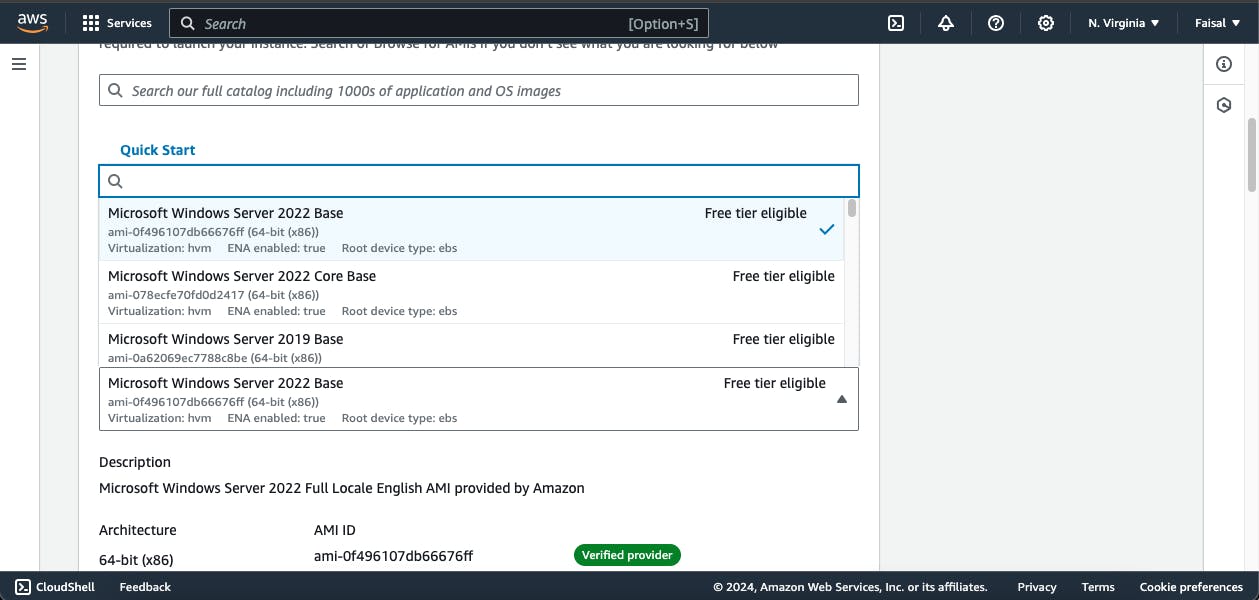
- Select the appropriate Windows Server AMI version for your needs. AWS offers various Windows Server versions, including the latest 2022 edition.
Step 2: Pick an Instance Type and Key pair
Instance types define the virtual hardware configuration (CPU, memory) of your EC2 instance. Consider factors like workload requirements and budget when selecting an instance type. AWS provides a comprehensive list of instance types with detailed specifications to help you choose the right fit.
Select an existing key pair(which you know the location of) or create a new one.

Step 3: Set Up Security Groups
- Security Groups act as firewalls, controlling inbound and outbound traffic to your instance. Create a new security group and define rules to allow RDP (Remote Desktop Protocol) access from your IP address or a specific IP range.

Step 4: Configure Storage
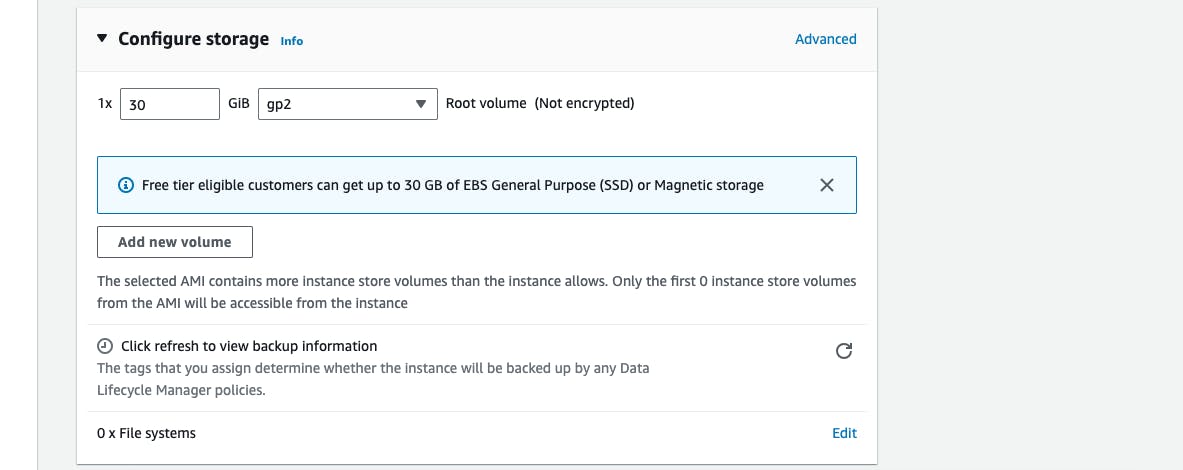
- Configure storage options by selecting the desired EBS (Elastic Block Store) volume size for your instance.
Step 5: Review and Launch the Instance
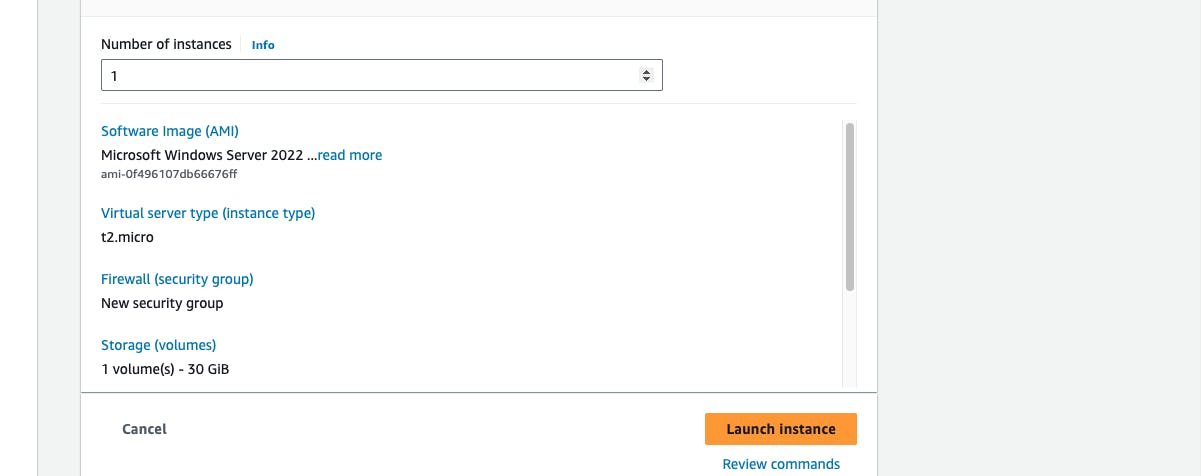
- Specify the number of instances you want to launch.
- Review your instance configuration and launch the EC2 instance.
Step 6: Connect to Your Instance
- Once the instance is launched and successfully running, you can connect using Remote Desktop Protocol (RDP) and RD client app.

Here's how to connect with RD Client app:
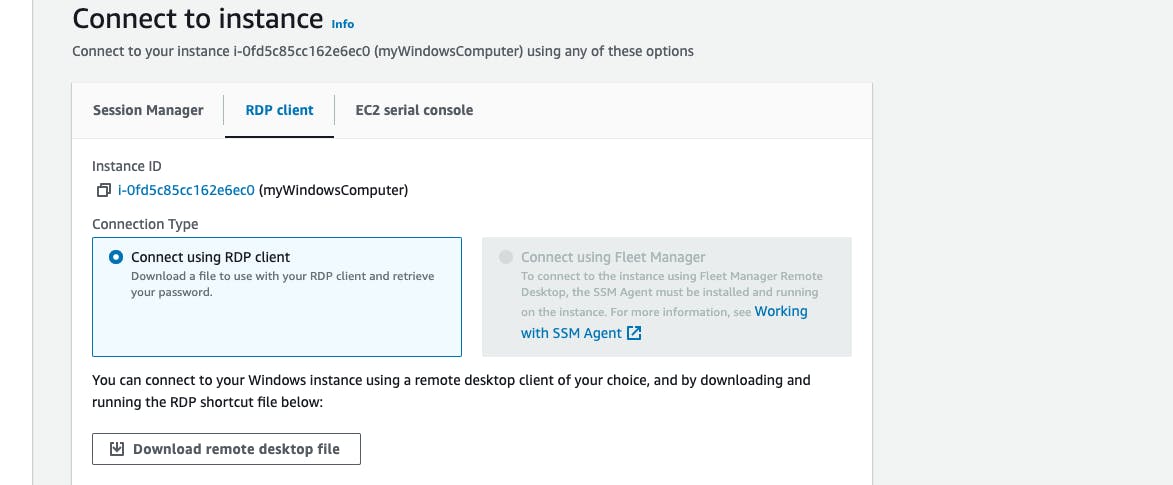
- On your running instances page, select your windows instance and click on connect.

- Select the
RDP clienttab and selectDownload remote desktop file. Take note of where the file will be downloaded to.
- View your username and password. Your username will already be there. To get your password select
Get password

- Upload your key pair file and select decrypt. Your password will be generated for you.

Locate your
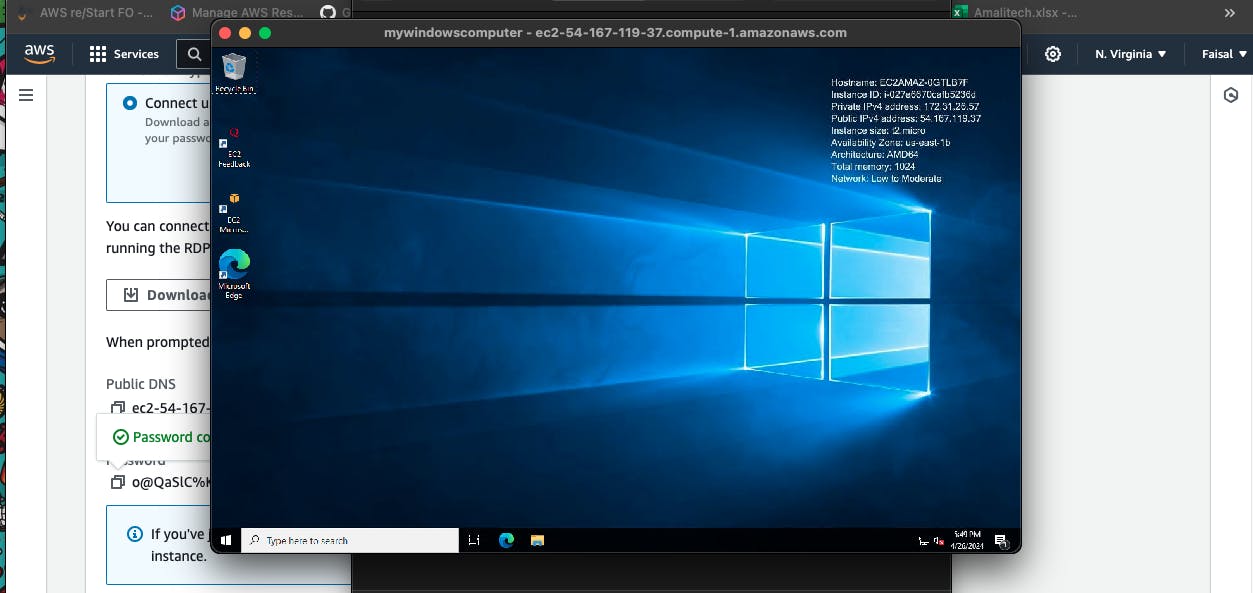
Remote desktop filewhich was downloaded earlier, and open it. Make sure you have RD client installed.Type in your user name and password, and wait for your desktop to load.
Additional Tips:
- Explore additional AWS services like Amazon S3 for storage or Amazon RDS for a managed database solution to complement your Windows EC2 instance.
By following these steps, you'll have a Windows Server instance up and running on AWS EC2, ready to host your applications or serve as a development environment. Remember, this is a basic setup guide, and AWS offers a wealth of documentation and tutorials to delve deeper into specific configurations and security best practices.
